Creating your first layout with FlexBuilder
Note
This document contains embedded YouTube videos, if you are reading the PDF version they will not load - it's recommended you using the online version instead, part of the online manual at: http://docs.flexbuilder.ninja
What is the recommended workflow for creating a new layout from scratch?
Every new layout has 4 steps:
- Select (or create) a RootFlexContainer to hold your layout, and control shared settings
- Add an initial FlexContainer to start configuring the layout
- Create and add your Layout using nested FlexContainers and FlexItems, and/or FlexTemplates
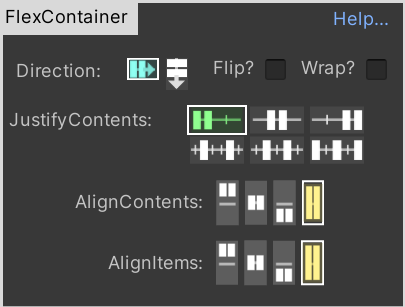
Note: Each FlexContainer has a pair of buttons for adding child FlexItems, or child FlexContainers:

Here's an example of creating a basic mobile UI layout, making use of several FlexTemplates to speed up the design process:
Note
To see how the different parts work together, read Guide: Anatomy of a Layout
RootFlexContainer
🏷 Detailed article online at: https://flexbox4unity.com/2022/06/24/guide-rootflexcontainer-rfc/
First of all you MUST have a Root Flex Container. You place this somewhere on your Unity Canvas, either directly as a child of the main Canvas GameObject, or as a child to any RectTransform on your Canvas.
The RootFlexContainer (RFC) serves several purposes:
- Provides a gateway between Unity's global layout system (RectTransform/UnityUI) and CSS-Flexbox (FlexBuilder)
- Controls the size of Flexbox's virtual viewport (embedded into your Canvas)
- Provides global-settings applied to the whole sub-layout of Flexbox (e.g. 'which LayoutAlgorithm to use')
Typically you configure the RFC's RectTransform to expand to fill the full Canvas, and place it as the main object on the Canvas.
When you want to have one or more popup windows / modal dialogs, you typically add additional RFC's onto the same Canvas, each one set to full size, and then size/position your modal within that RFC.
Warning
⚠ Note: each RFC is a 100% independent layout sub-system - they will completely ignore each other, and layout will only happen internally to them.
FlexContainers
(see Guide: Flex Elements for more detail)
Within your RFC you will place one or more FlexContainers. Each FlexContainer is given a size, and then it sizes and positions all its child objects within itself (hence the name '...Container'). It has controls to set the layout-direction, whether to align objects at the left edge, right edge, etc.
FlexContainers cannot themselves have UI elements (Buttons, Labels, etc) - but they can contain them (i.e. have those things as children)
Warning
⚠ Note: technically the RFC is also a FlexContainer itself, but it has some overrides and special extra behaviour.

FlexItems
(see Guide: Flex Elements for more detail)
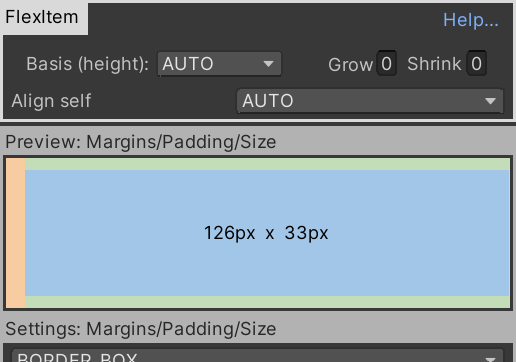
Within each FlexContainer will be one or more child FlexItems. These are the wrappers for your individual UI elements.
In almost all cases you will have one GameObject per UI element (Button, Text, InputField, etc), and each GameObject will have one FlexItem to control how that UI element should be sized.

UI Elements
These are the standard UnityUI elements - everything works exactly as in UnityUI, except that their size and position will be controlled by Flexbox/FlexBuilder.
Note
⚠ Tip: you can combine both FlexBuilder and RectTransform/UnityUI when sizing individual elements. See below.
There are two ways to connect a FlexItem to a UIElement (eg a Button):
Option 1: Direct attachment
In this approach you first create a UI Element in Unity (e.g. a new Button control), and then you attach a FlexItem component to that GameObject.
For most cases this is sufficient. The control will be 100% sized by Flexbox (Flexbox overrides the RectTransform completely)
Option 2: Childing/Parenting
In this approach you create an empty GameObject, and attach a FlexItem to it. Then you add your UI Element as a child of the FlexItem's GameObject.
This is more powerful and provides finer control. The UI Element is now being indirectly sized by Flexbox - typically you would configure the UI Element's RectTransform to "expand to fill" the parent object, and leave it. At that point Flexbox is effectively controlling the size, but if you altered the RectTransform's anchors/handles it would interact with the Flexbox size.
This approach is typically used in complex UIs where you want to attach *multiple UI Elements to a single FlexItem, and have Flexbox treat them as a single entity. Unity themselves did something similar (but inferior) when they designed their Button component: it is not one component but several parented together. FlexBuilder's approach is more powerful and easier to work with, it can support multiple child UI Elements all as siblings, children of the same single FlexItem, which Flexbox will treat as "one".
This apprach is also used where you are highly comfortable with RectTransforms and want to fine-tune the size of an element via the RectTransform UI.
Building Layouts
Note
💡 If you have FlexBuilder-Pro, or the FlexBuilder-Templates add-on, then you can use Templates directly inside the UnityEditor to rapidly build a complex Flexbox UI via point-and-click. See Templates for more info.
In the UnityEditor you typically build a layout by:
- Create a RootFlexContainer (RFC) and add it to your Canvas
- Select the RFC. In the Inspector is a button to create the initial child FlexContainer - click it
- Select the child FlexContainer.
- It has multiple controls for how it will layout its children
- It also has buttons to "Add FlexContainer" and "Add FlexItem"
- ...use those buttons to keep adding more and more layers to your layout as needed
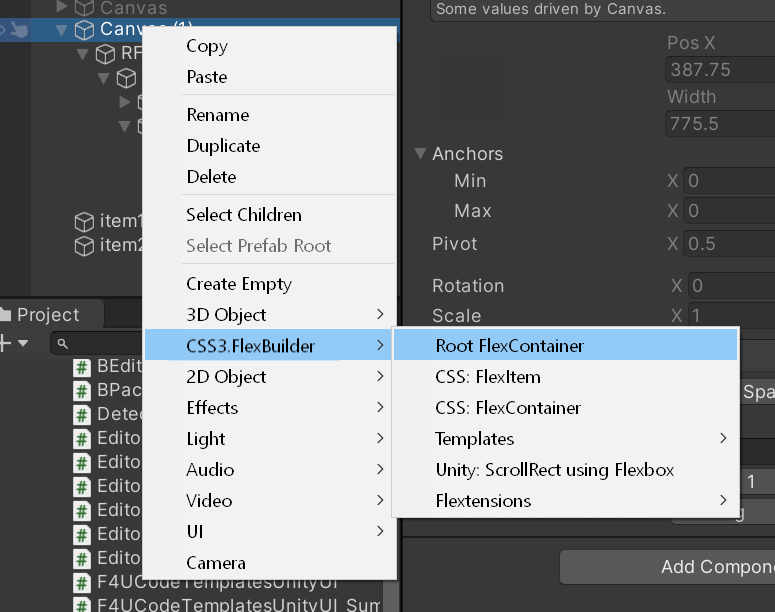
To create a RootFlexContainer you can right-click your Canvas (or any RectTransform) and add it from the context menu

The controls for layout inside a FlexContainer have many options:

Each FlexContainer has a pair of buttons for adding child FlexItems, or child FlexContainers:

Note
💡 For a complete worked example, see QuickStart: build a Layout.
Detailed Layout settings
For more detail on the different layout options, see:
- Guide: Positioning - using a FlexContainer to position child items
- Guide: Sizing - sizing of individual items
Troubleshooting
See Troubleshooting for common issues and solutions.