Getting Started with FlexBuilder
Note
This document contains embedded YouTube videos, if you are reading the PDF version they will not load - it's recommended you using the online version instead, part of the online manual at: http://docs.flexbuilder.ninja
How do I install it?
- Purchase FlexBuilder from the Unity Asset Store
- Open Unity, and create a new Unity project if needed
- Use the Unity Package Manager to download and install FlexBuilder into your project
Basics of Flexbox?
If you've never used CSS3/Flexbox before, try the first 2-3 pages of this tutorial to get the basics: https://www.w3schools.com/css/css3_flexbox.asp
If you're already skilled in CSS3/Flexbox, see the section below 'How can I quickly create a new project?', and/or "Flexbox made easy in Unity3D"
How do I use FlexBuilder?
In Unity, FlexBuilder uses GameObjects with two MonoBehaviours: FlexContainer and FlexItem.
If you select one of these objects in the Editor it will have either one (FlexItem) or two (FlexContainer and FlexItem) sections in the Inspector: containers need to configure their contents/children (using the FlexContainer settings) and themself (using the FlexItem settings). Plain UI elements only need settings for themself (FlexIte).
The top half of the FlexContainer inspector has a collapsible area for FlexTemplates, which are a faster way to build UIs quickly, and can be extended (e.g. by purchasing the FlexTemplates package).
The top half of the FlexItem inspector has a visual BoxModel previewer for the padding/margins/size/shape.
FlexItem settings are for controlling individual items - make a button wider, or control the width of a sidebar. FlexContainer settings are for controlling layout - change it from vertical to horizontal, or set child-items to be centered instead of left-aligned.
How can I quickly create a new project and set its basic parameters?
Every new layout has 4 steps:
- Select a RootFlexContainer to hold your layout, and control shared settings
- Add an initial FlexContainer to start configuring the layout
- Add lots of child FlexContainers and FlexItems to make an interesting layout
- For each FlexItem, add a UnityUI element (a button, or an image, or text, etc)
Note
You can also FlexTemplates (built-in buttons in the FlexContainer inspector) to shortcut steps 2-4 above
1. Creating a RootFlexContainer (RFC)
Right-click in the Hierarchy view, select 'CSS.FlexBuilder' from the menu, and select 'RootFlexContainer':
2. Configure the FlexItems and FlexContainers
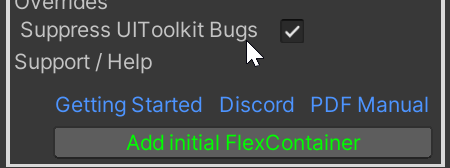
Select your RootFlexContainer, and click 'Add Initial FlexContainer'.

Then add your layout to the FlexContainer, using nested FlexContainers with different orientations, padding, margins, etc.
Note
Alternatively: click one of the FlexTemplate buttons to auto-create a common layout
In this example, we create three images side-by-side, automatically sized and positioned:
3. Add UI components to your FlexItems
Each FlexItem controls the size + shape + position of a single UI-element. Every place you want a new element - an Image, a Text, a Button - you need to add a new FlexItem (select the parent FlexContainer that you want to hold the new element, and click the "Add FlexItem" button).
Select your newly-created FlexItem, and then add a child UI component (or attach it directly to the FlexItem).
Note
Alternatively: click one of the FlexTemplate buttons to auto-create common basic elements (Text, Image, etc)
Note
Directly-attaching UI components to FlexItem GameObjects is supported, but it's an advanced setup, and can cause problems for larger/more complex layouts. It's recommended to add each UI component as a direct child of a FlexItem instead wherever possible.
Warning
Each FlexItem should have ONLY ONE Unity UI element attached to it, or as a child. Adding multiple to a single FlexItem is possible but is an advanced use and can generate hard-to-edit layouts
What next?
Read Flexbox made Easy